Fall prevention wire
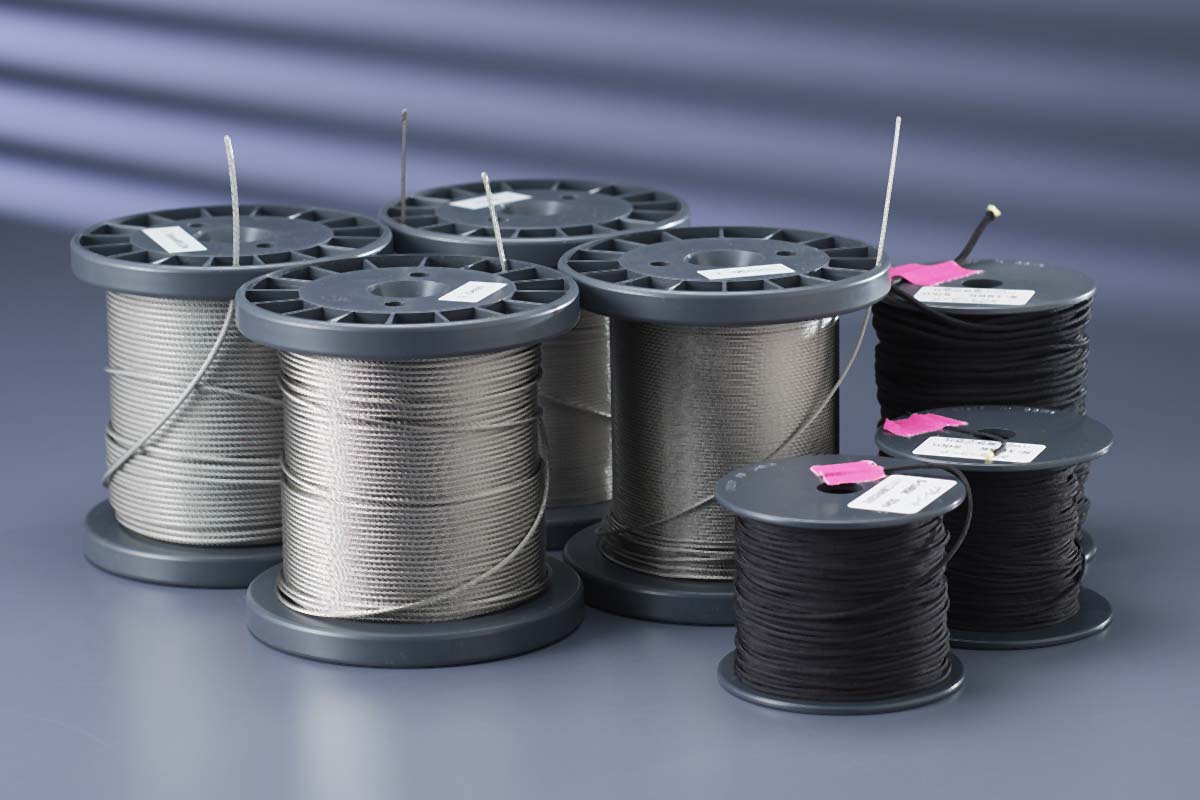
When installing equipment in high places, it is recommended to install fall prevention wires as a safety measure to prevent accidents and damage in the event of a fall.
We also provide tools and wires for installing fall prevention wires.
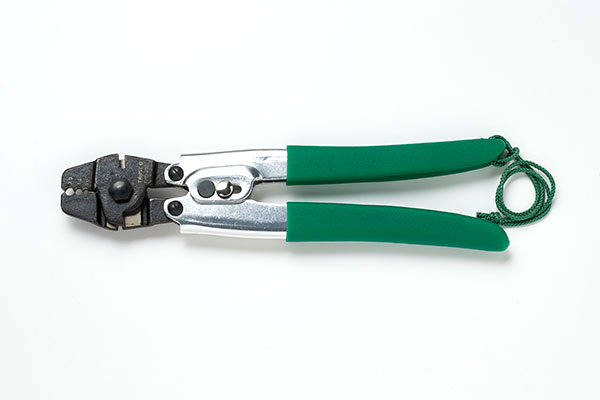
Wire Cutting Tools
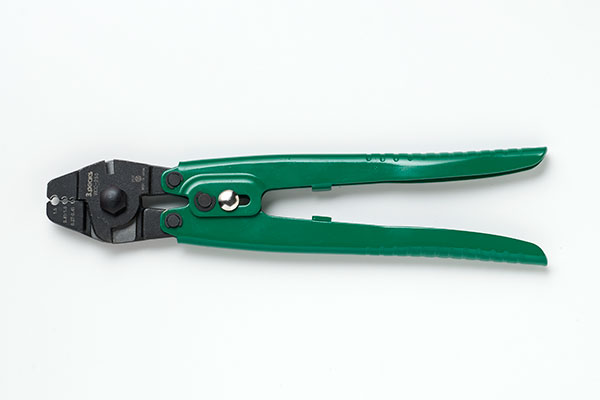
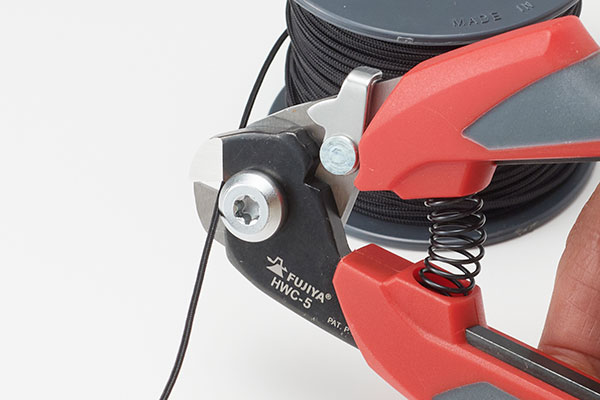
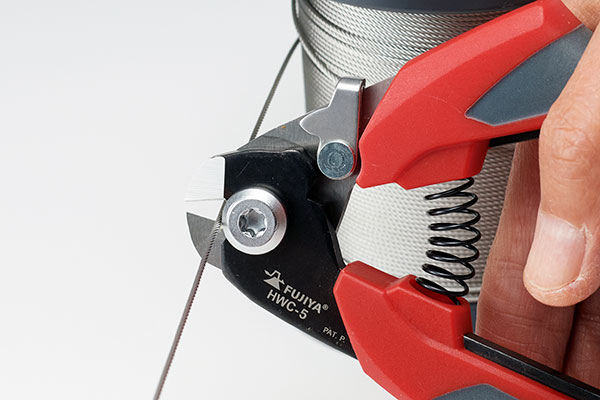
Wire cutter
To cut the wire to be used, use a wire cutter, which is a dedicated tool, to align the cut ends of the wire and make it easier to pass the wire through the crimp sleeve. Please use wire cutters when cutting wire.
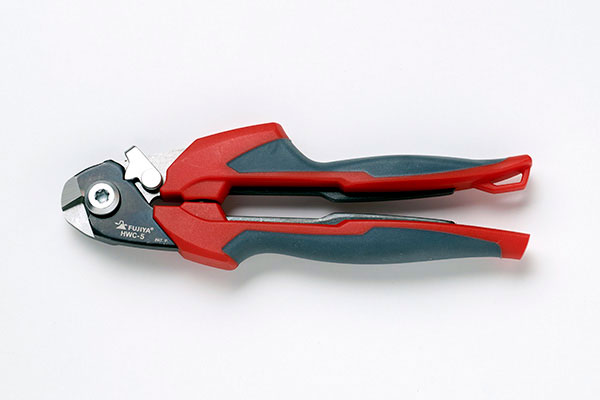
FUJIYA
Handy Wire Cutter 180mm HWC-5
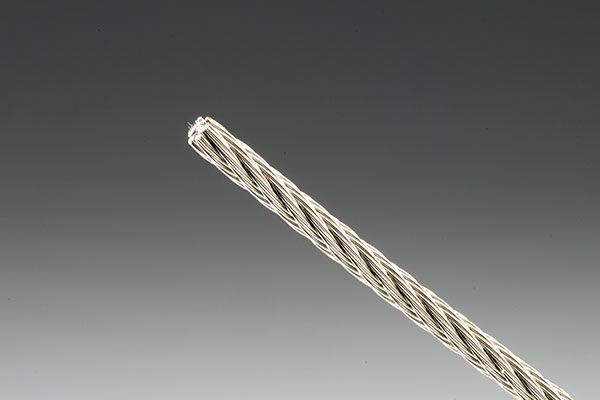
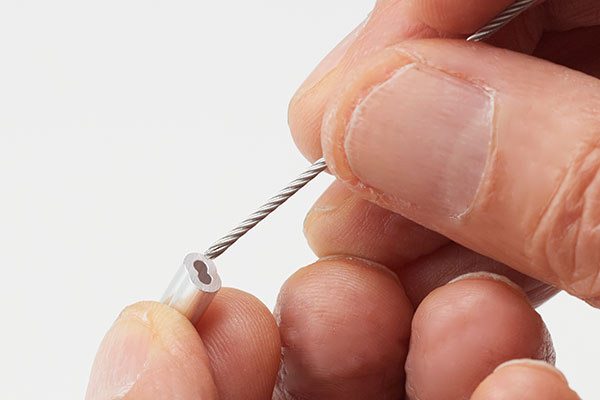
Good
Cut cut by tool. No fluff and easy to pass through crimp sleeve.
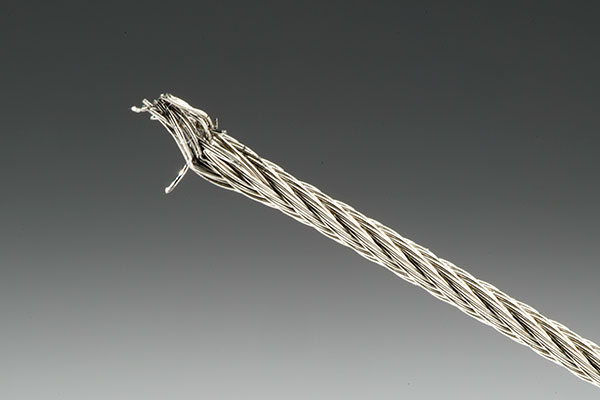
Not good
The cut end is furry. Difficult to pass through the crimp sleeve.
Type of wire
Available in two types: soft Kevlar wire or stainless steel wire suitable for outdoor use.
Kevlar wire
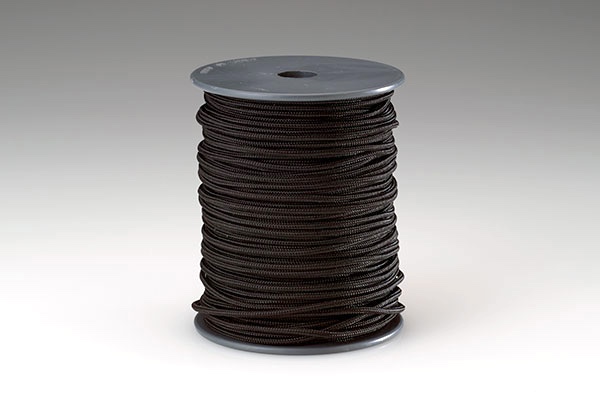
The wire is soft and suitable for indoor use.
High-tech fiber-based braided cords >
KEVLAR® >
| Product Number | core thread | spun yarn | color | wire diameter(mm) | Breaking Strength(N) | Breaking elongation(%) |
| S-10BK | Kevlar® | Polyester | Black | 1.05 | 630 | 3.5 |
| S-14BK | Kevlar® | Polyester | Black | 1.40 | 980 | 4.0 |
| S-19BK | Kevlar® | Polyester | Black | 1.98 | 2,200 | 3.5 |
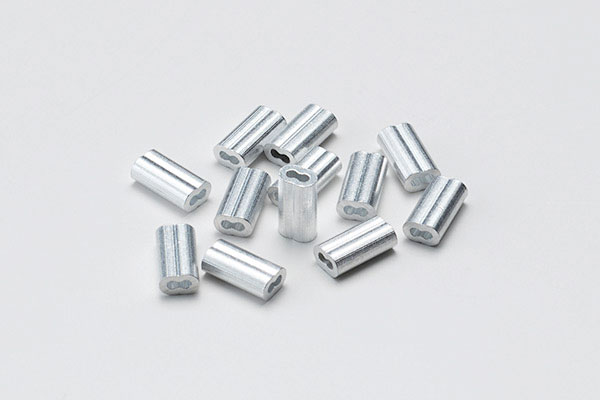
Crimping tool (example)
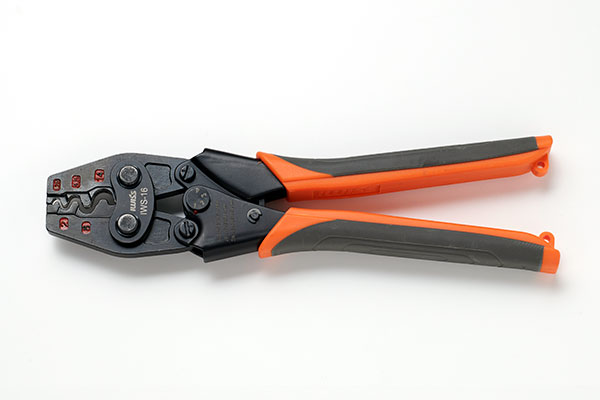
IWISS
IWS-16
Bare crimp terminal Bare crimp sleeve Crimping tool JIS compliant
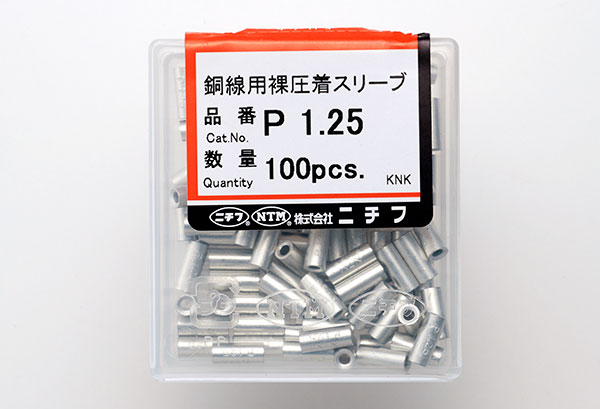
Crimp Sleeve P1.25
Suitable for S-10BK
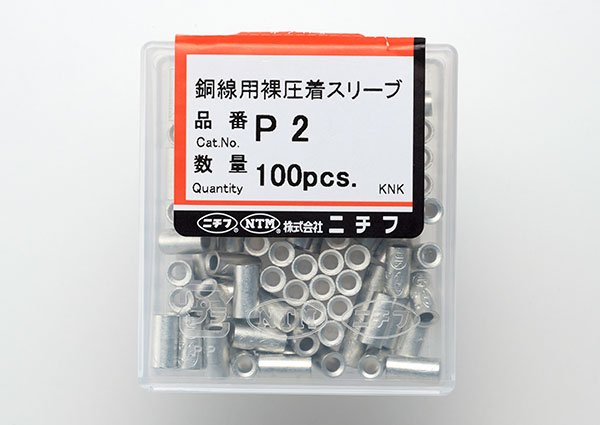
Crimp Sleeve P2
Suitable for S-14BK
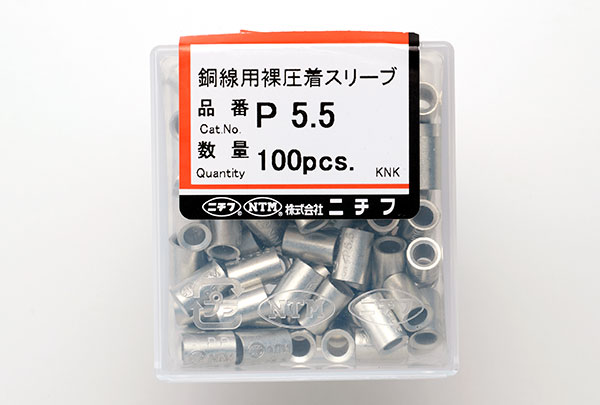
Crimp Sleeve P5.5
Suitable for S-19BK
Kevlar wire and Sleeve Set
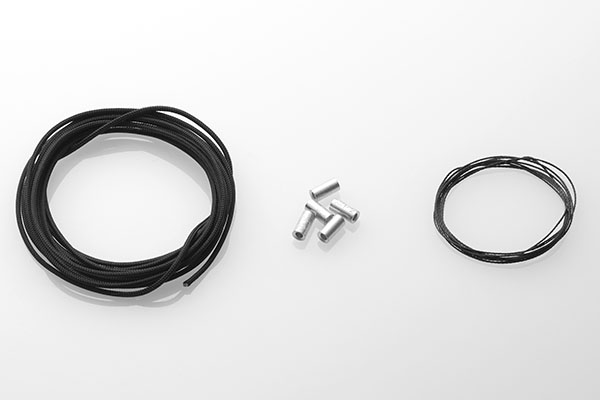
A set of Kevlar wire, sleeves, and thread used to thread the wire through the sleeve.
Stainless Steel Wire
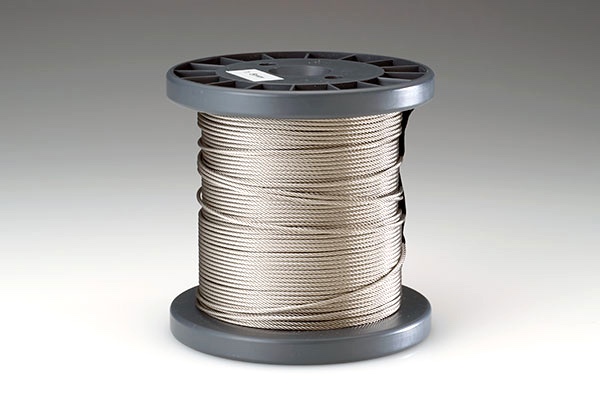
Recommended mainly for outside use.
Types of wire ropes
SC type 7×7

This configuration combines 7 more 1x7s.
It is more flexible than the E type.
| Product Number | Nominal diameter (Standard value) | Wire diameter (mm) | Weight (g/1000m) | Breaking load(kg) |
| SB-100 | 1.00 (1.03) | 0.11 | 3,940 | 89.2 |
| SB-120 | 1.20 (1.25) | 0.13 | 5,500 | 118.0 |
| SB-150 | 1.50 (1.56) | 0.165 | 9,400 | 188.7 |
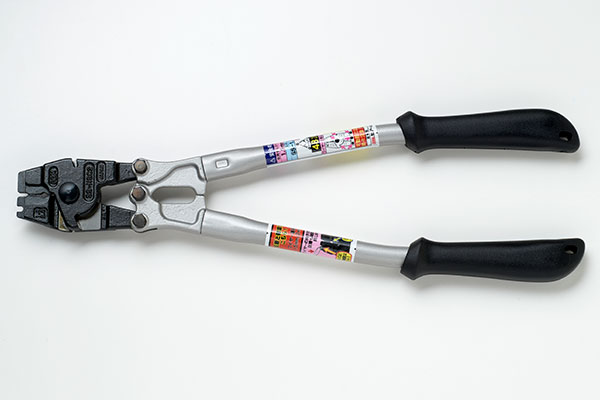
Crimping tool (example)
Wire clamp cutter (small size)
3.Peaks
WCC-250
TRUSCO clamp cutter
THC250
Aluminum Sleeve Dalma Type
Φ1.0
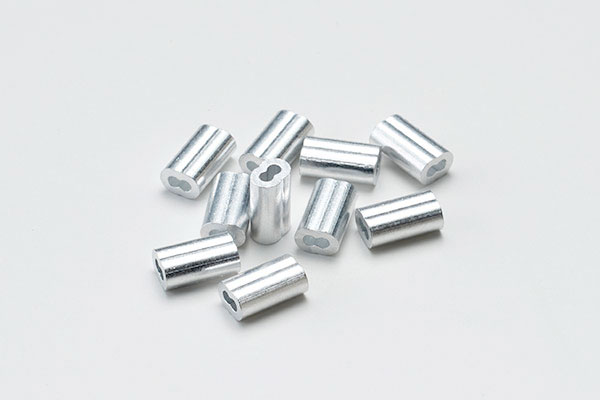
Φ1.2
Φ1.5
Wire Clamp Cutter Load Capacity Description Manufacturer

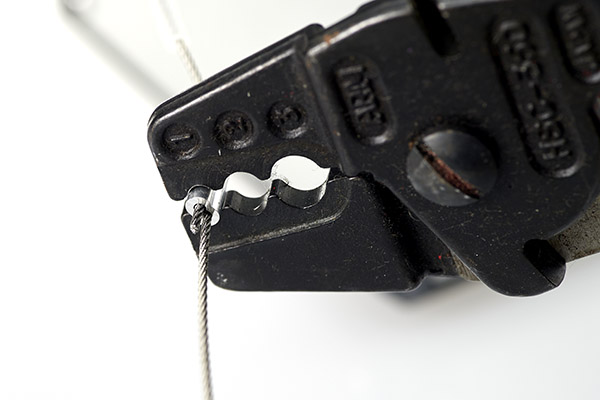
ArmSWAGER HSC-350
Applicable wire rope diameter(mm):1.5/2.0/2.5/3.0/3.5
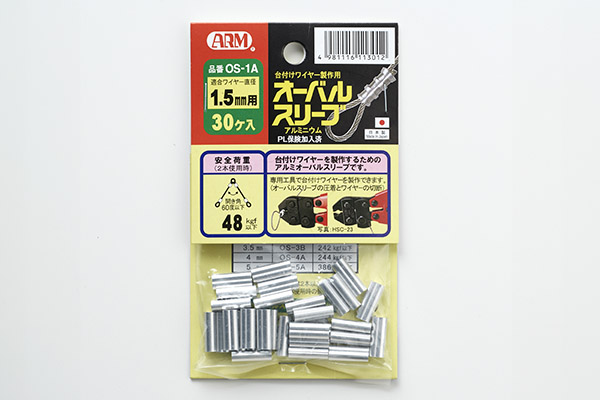
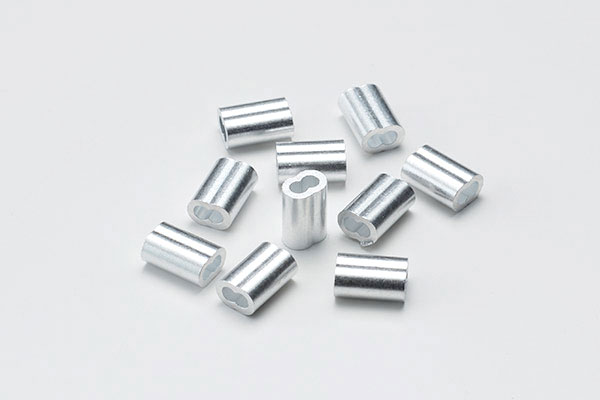
Arm Opal Sleeve
(Aluminum sleeve for compression)
Manufacturer’s Web Site >
Procedure for producing a wire with a base (crimping method) >
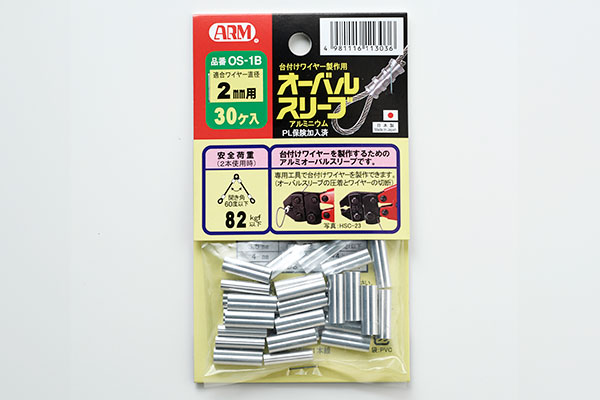
Arm Opal Sleeve
(Aluminum sleeve for compression)
Manufacturer’s Web Site >
Procedure for producing a wire with a base (crimping method) >
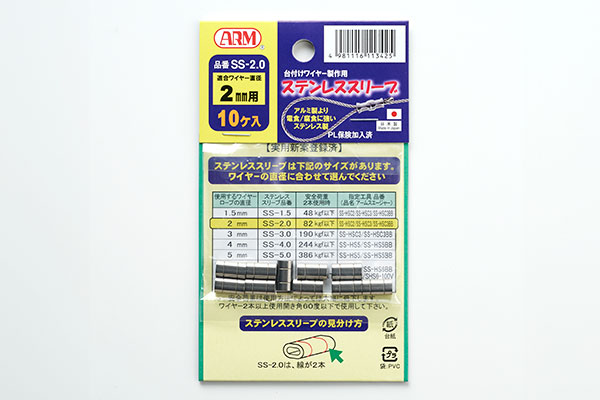
Stainless steel to prevent salt damage.
ArmSWAGER
(for stainless steel sleeve)SS-HSC2
Applicable wire rope diameter(mm):1.5/2.0
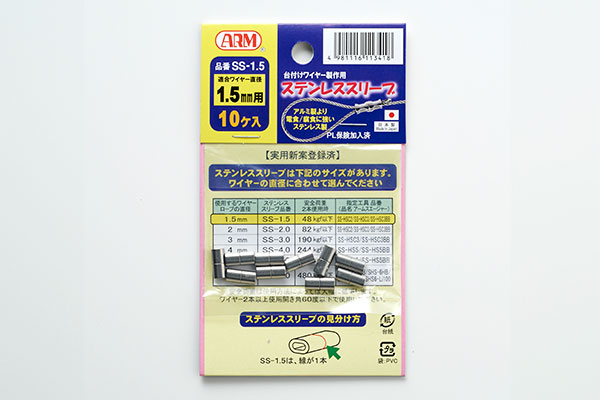
Arm Stainless steel sleeve (stainless steel)
Manufacturer’s Web Site >
Procedure for producing stainless steel-bedded wire (crimping method)>
Arm Stainless steel sleeve (stainless steel)
Manufacturer’s Web Site >
Procedure for producing stainless steel-bedded wire (crimping method)>
Stainless wire and Sleeve Set
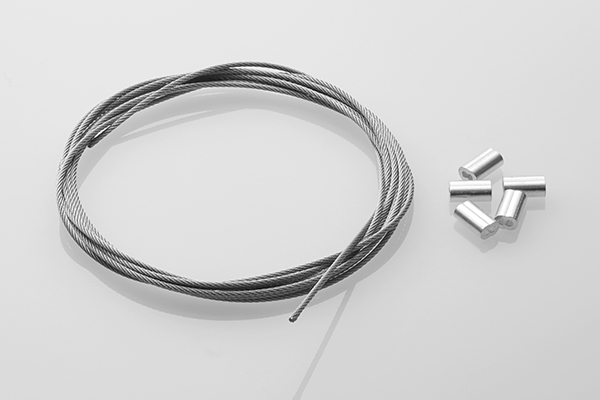
A set of stainless wire, sleeves.
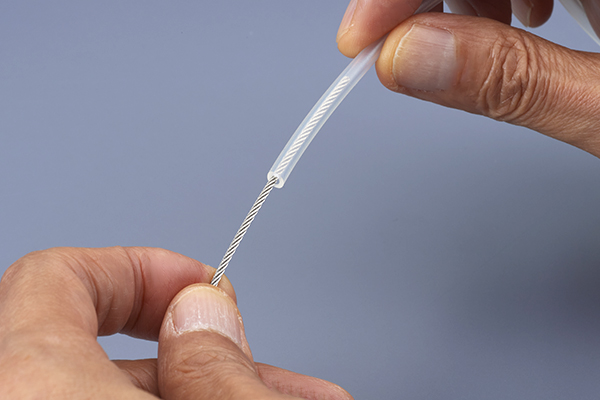
Heat Shrink Tube
The sleeve portion is covered with heat-shrinkable tubing to prevent injury from the wire end coming out of the sleeve.
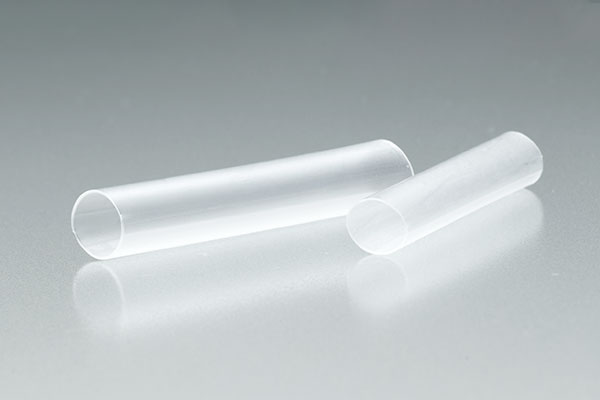
HSTT25-48-QC
HSTT19-48-QC
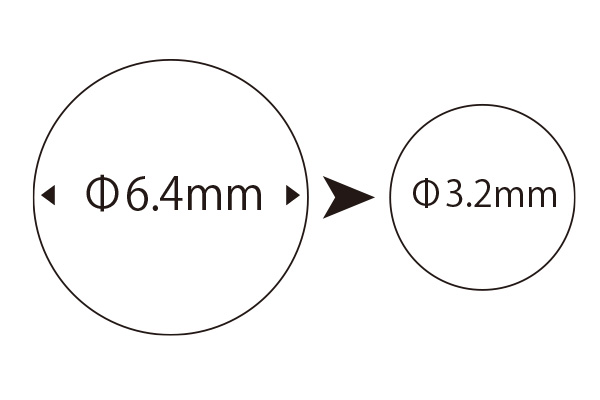
Silicon Tubes
Mitigates impact from drops.
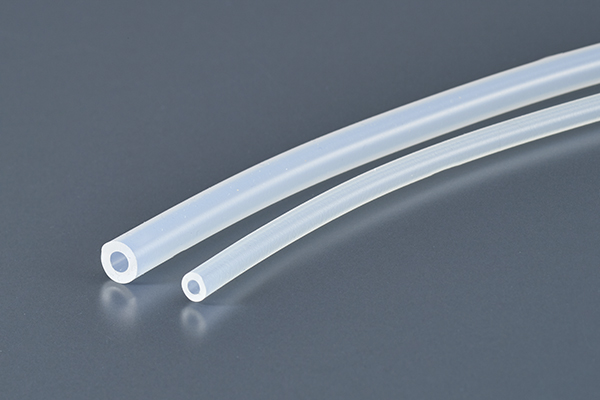
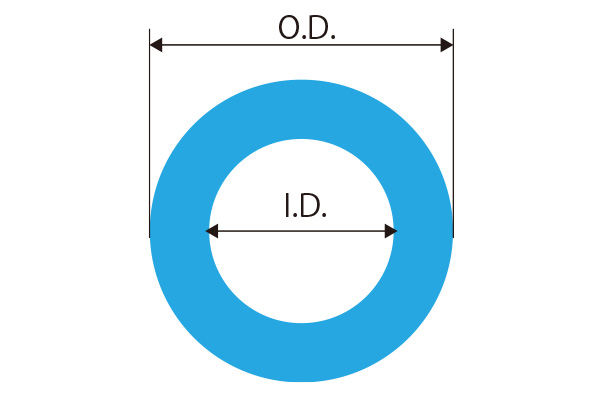
| I.D | O.D |
| 2mm | 4mm |
| 3mm | 6mm |

Fall prevention wire fabrication procedure
Kevlar fiber wire (for indoor installation)
1.Cut the wire to an appropriate length.
Cut a little extra length to make a loop on both sides of the wire.
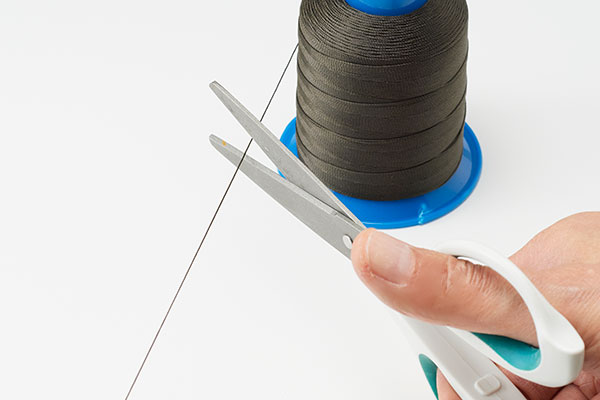
Kevlar fiber wire is soft and difficult to thread through the sleeve, so prepare a thread to make it easier to thread the wire.
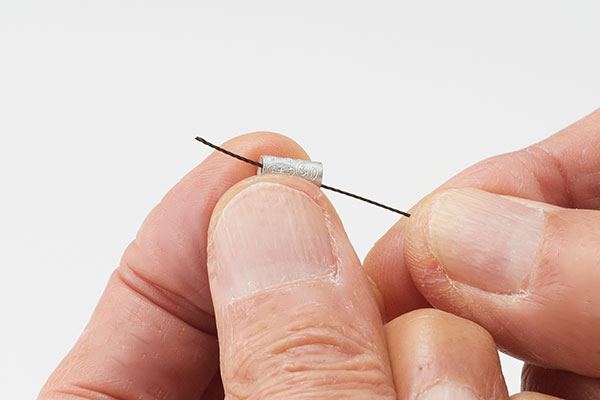
Pass the cut yarn through the sleeve.
Thread the thread through the sleeve and loop it around the wire.
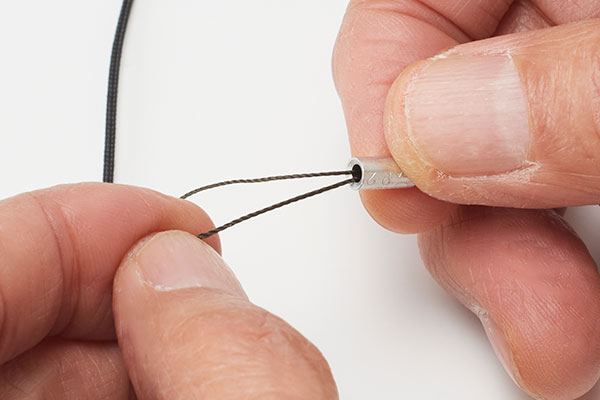
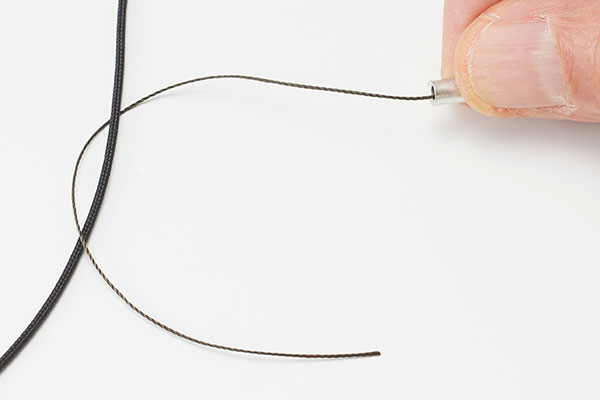
5.Pass the thread through the wire back into the sleeve.
The thread is threaded through the sleeve
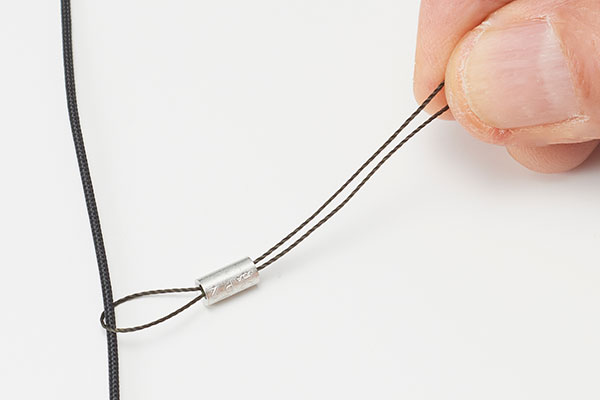
Pull the thread to thread the wire through the sleeve.
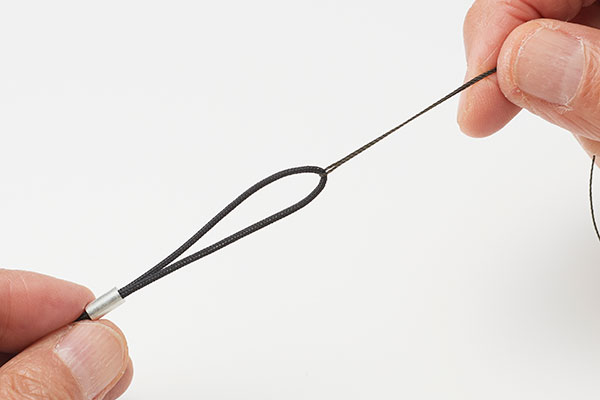
Pull the thread until an appropriately sized loop is formed. Be careful not to pull the wire out.
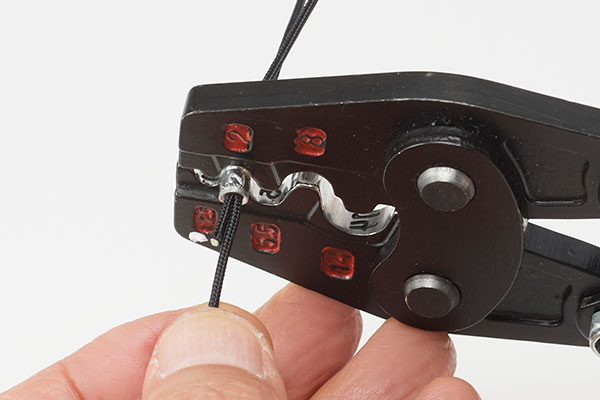
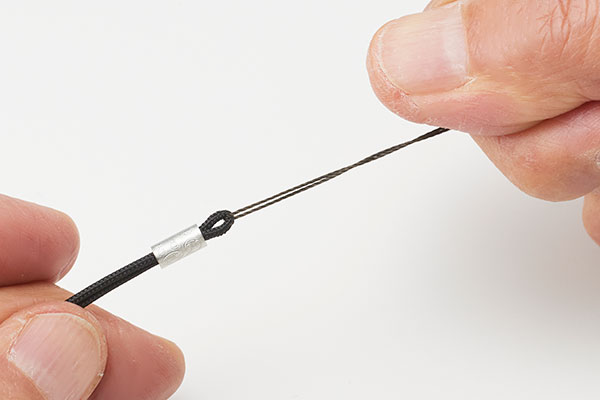
- Crimp the sleeve using a crimping tool.
Crimp the sleeve at two slightly different positions.
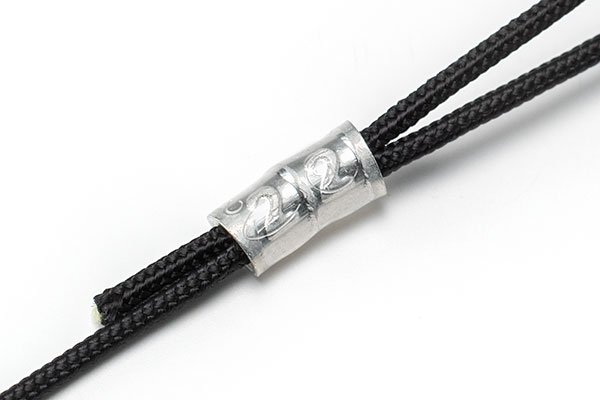
The wire has been crimped and secured with a sleeve.
Stainless steel wire (suitable for outdoor installation)
1.Cut the wire to an appropriate length.
Cut a little extra length to make a loop on both sides of the wire.
Thread the cut wire through the sleeve.
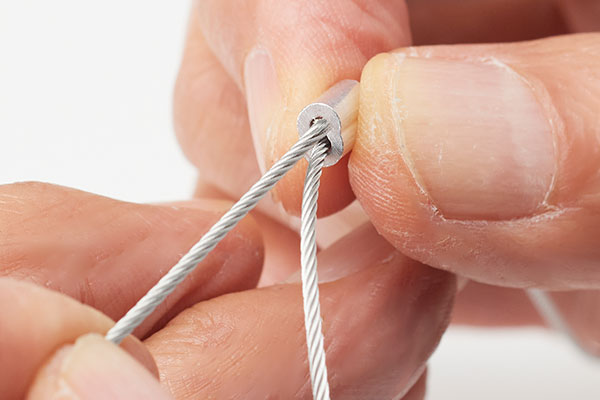
After pulling the wire through the sleeve to some extent, fold it back and pass the wire through the sleeve.

Wire folded over and through the sleeve.
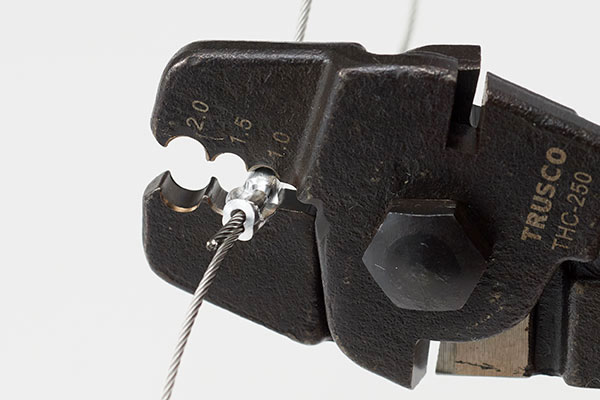
4.Crimp the sleeve using a crimping tool.
Crimp the sleeve at two slightly different positions.
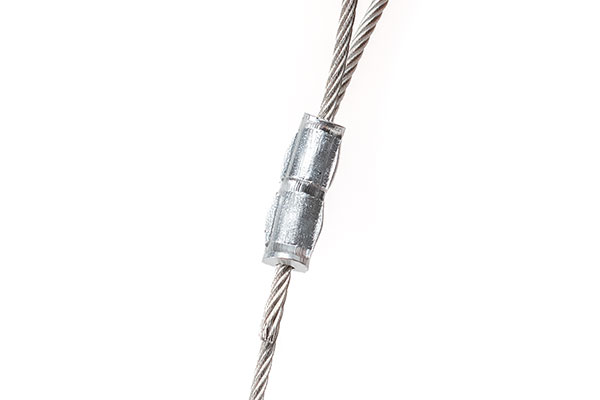
The wire has been crimped and secured with a sleeve.
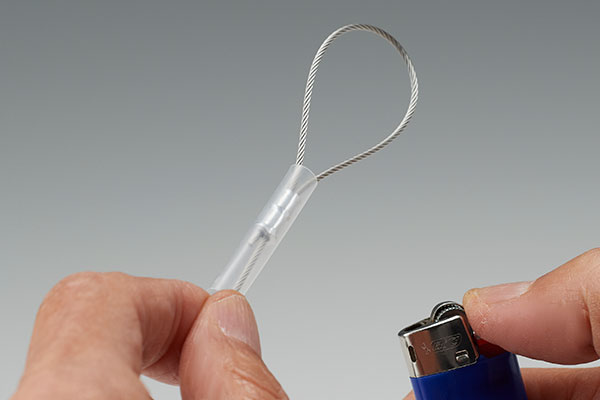
5.Cover the sleeve portion with heat-shrinkable tubing.
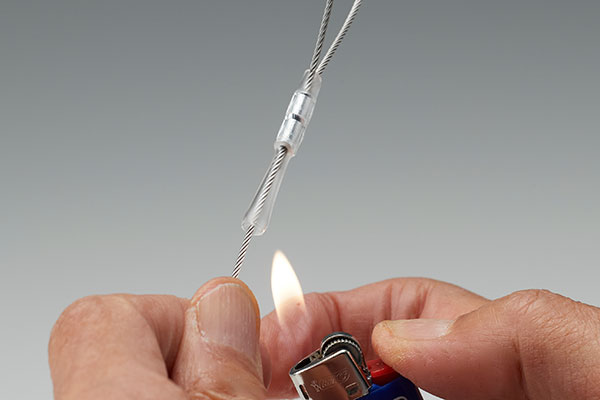
6.The sleeve portion shrinks when the heat-shrink tubing is seared with a lighter.
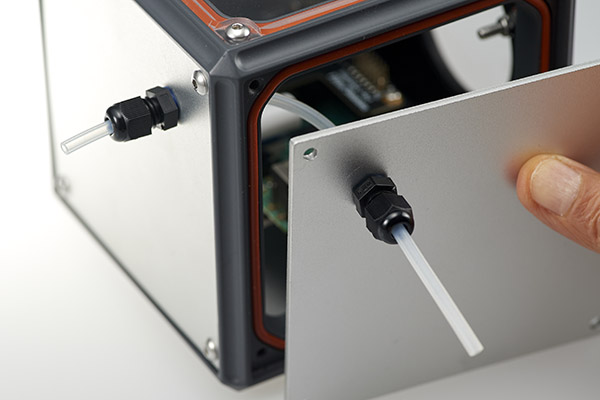
Waterproof Wire Panel for Waterproof Cube Case
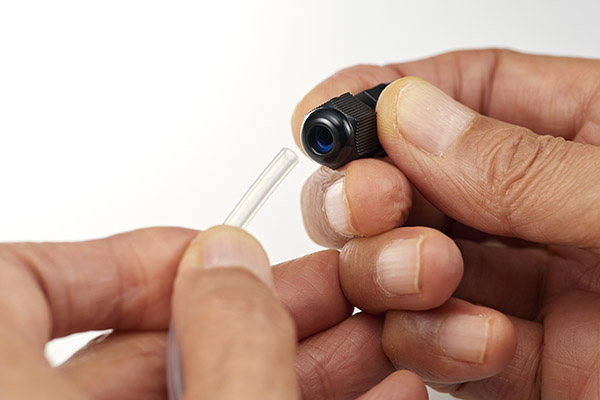
1.Remove the cable gland cap and pass the silicone tube through the cable gland.
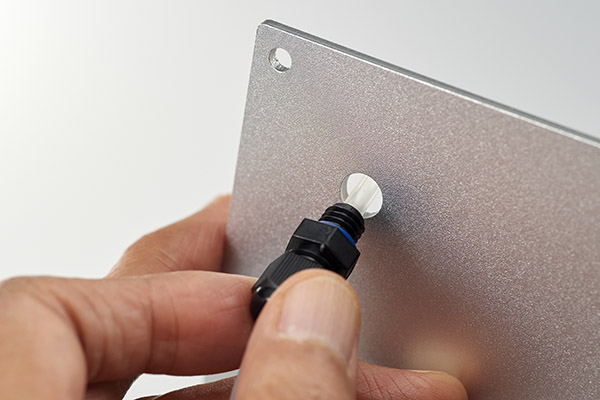
2.Thread the cable gland through the wire panel.
3.Secure the cable gland by attaching the cable gland caps from the opposite side of the panel.
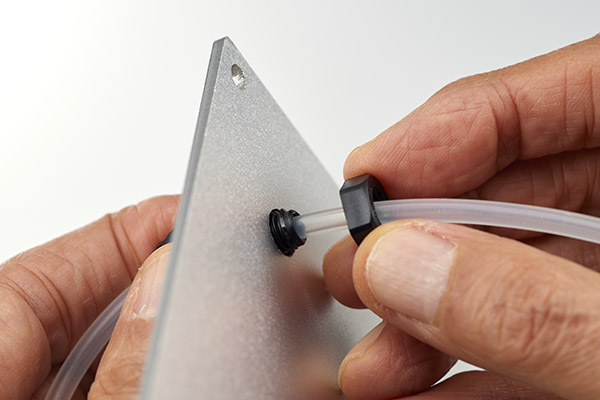
4.Attach a cable gland to another wire panel in a similar way.
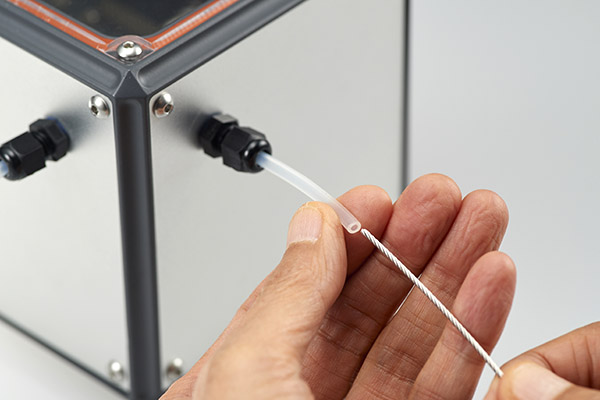
5.Thread the wire through the silicone tube.
6.Thread both ends of the wire through the sleeve.
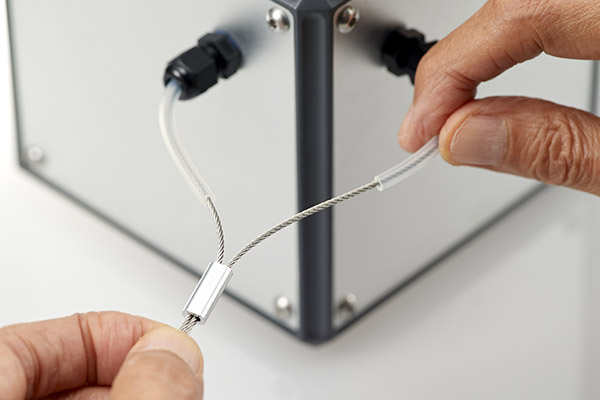
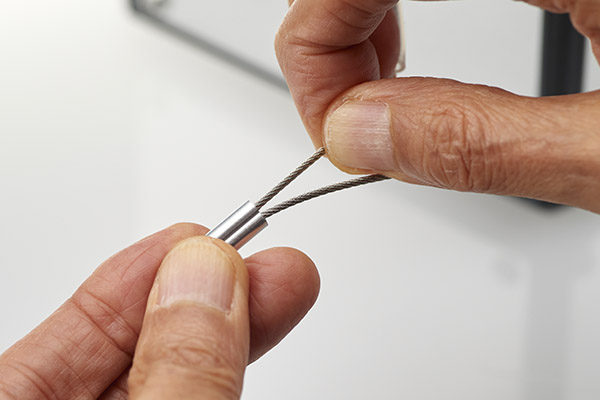
7.Adjust the length of the wire.
8.Crimp the wires using a crimping tool. Crimp the wire at two different positions.
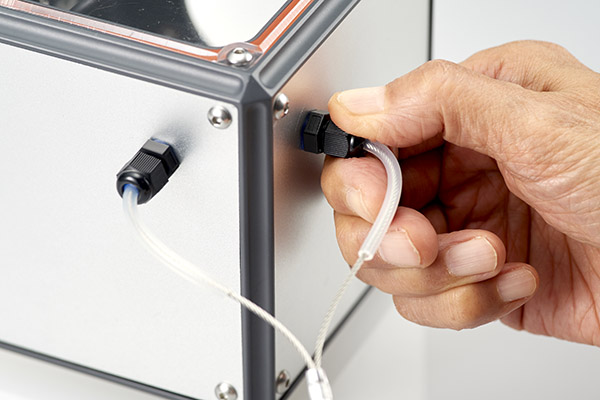
9.Check cable glands for looseness before use. If loose, waterproofing will not be maintained.
Contact Us
About Quantity Discounts
We offer a quantity discount service for corporate customers. If you are considering purchasing in large quantities, please contact us in advance using the inquiry form below. Please note that the discount varies depending on the type of product, selling price, quantity, and time of purchase.